Promote your Open House on Social Media
After logging into Back at You, in top-left hand corner under the CB logo select SBAY (Social Bay)
From Social Bay Dashboard, from the left-hand select Listings
Select Schedule a Listing Post next to the listing you want to promote
Using the dropdown, change Listing Status banner from Just Listed to Open House
Make edits to copy or photos as necessary and hit Continue
Select Yes, Let’s Advertise it! from the Turn Your Post Into an Ad options
By default your ad will be visible 15+ around the city that the property was listed in - however you can customize this in the customization settings in the next window (please note that 15+ miles is the closest proximity you can target per Facebook guidelines to comply with Equal Opportunity Housing rules).
Next set a duration and total budget
If your billing is not already set-up it will then ask for you to set-up a payment option
Then you will schedule & continue to choose when it will go out and which channels you prefer it to go out on, then click Let’s Schedule to post and start advertising.
Create an Open House Sign In Page
Log into Back At You from your laptop or tablet before your open house.
On the left-hand menu navigation, select Listings, and then click Open Houses under “Open Houses.”
Locate the open house you will be hosting. Once located, on the right-hand side, click on the ellipses (⋮) and then select Sign In Page.
You will then be redirected to a custom sign in page for your open house!
Use Personalizable Open House Follow-up Templates
After logging into Back At You, on the left-hand side toolbar select the
Marketing icon. Then click Email.On the next screen, a window will open up with multiple templates. From the Content Type dropdown Company Templates is selected. Under Category, choose Open House. Choose one of the templates by clicking the Select button.
Next, the template will open with some editable fields outlined in a dashed box. Replace the editable fields with the correct information for that client.
After making the changes to the editable fields, Click Next.
In the next window, you will have the option to add recipients and make edits to the rest of the email. Make sure you:
Change the subject line
Add a recipient
Reread text for accuracy
Add yourself as a recipient, so that you are aware of when the client receives the email
Once you have your email the way that you would like, Click Next and your email will be sent.
Email Broker Open House Flyer/Eblast
Part 1: Creating Your Flyer
After logging into Back At You, on the left-hand side toolbar select the
Marketing icon. Then click My Saved Content.On the new screen, click the button in the top-right corner labeled Add Content.
A window will open up with multiple templates. Make sure under Content Type that
ClientBAY Templates is selected. Under Category, choose Eblast - Open House.
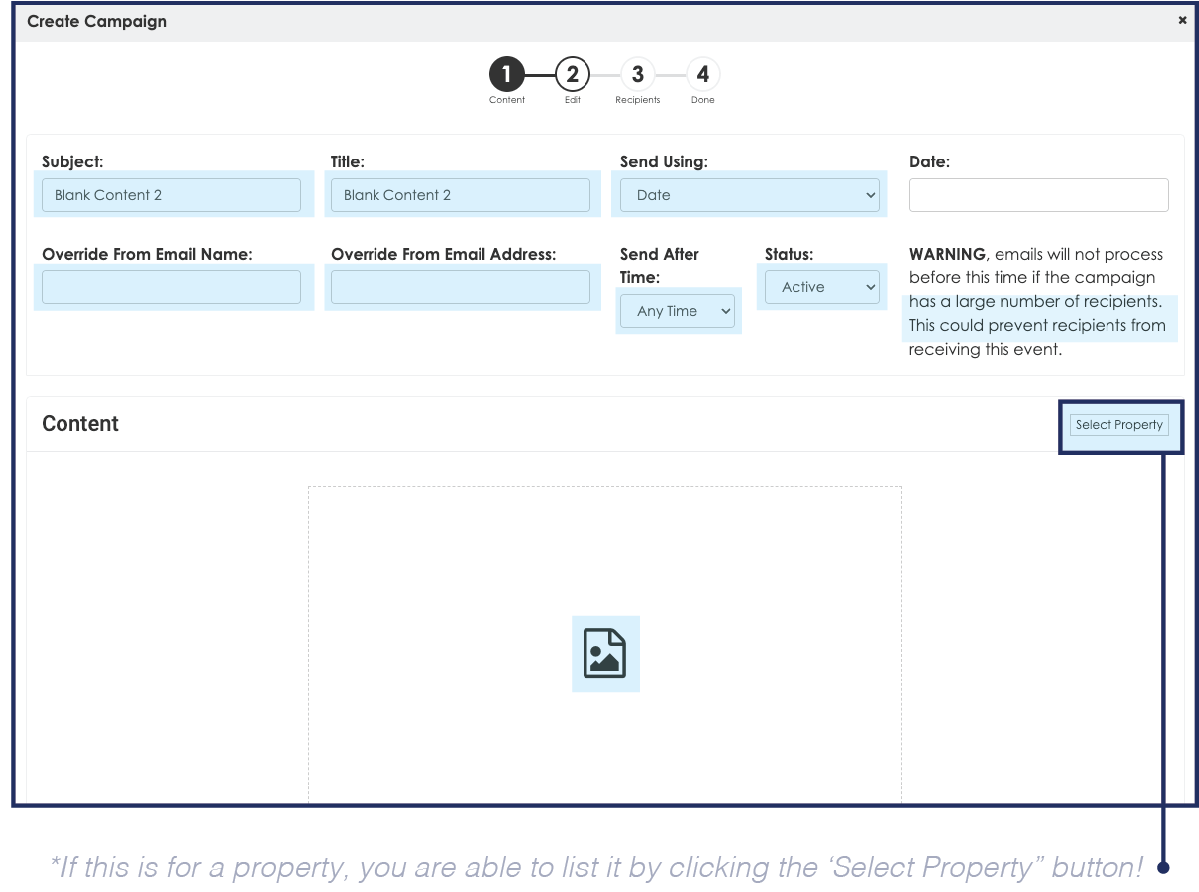
Pick one of the templates by clicking the Select button.Your new template will open. Be sure to name the template in the input box labeled
Content Name. Then click the button labeled Select Property.A new window will open. Under Property, you can search for the house by MLS # or by address.
Once a property has been selected, the information will pull from MLS. All the components
are editable including the pictures! Simply click on the image you would like to replace. click the
button called Select From Property Photos, and choose from any MLS pictures. You can also add new
pictures from another source by clicking Upload Images.Once you have edited the text and chosen the best pictures, remember to click Save!
Part 2: Creating a Campaign with Your Flyer
Now that content has been created, you’re ready to make a campaign from it. On the right-hand side,
select Save and Email.Change the Content Type to My Content, and select the content you created.
Put in an engaging Subject, and Title and specify a Date and Time
for this campaign to go out. Then click Next.Next you will choose your recipients. If you wish to invite an entire CBHL office, BAY makes this simple by
clicking the dropdown under Offices, then choosing the desired office. Once done, click Finish.Your campaign is now created! It will go out to the desired recipients at the specified date and time.
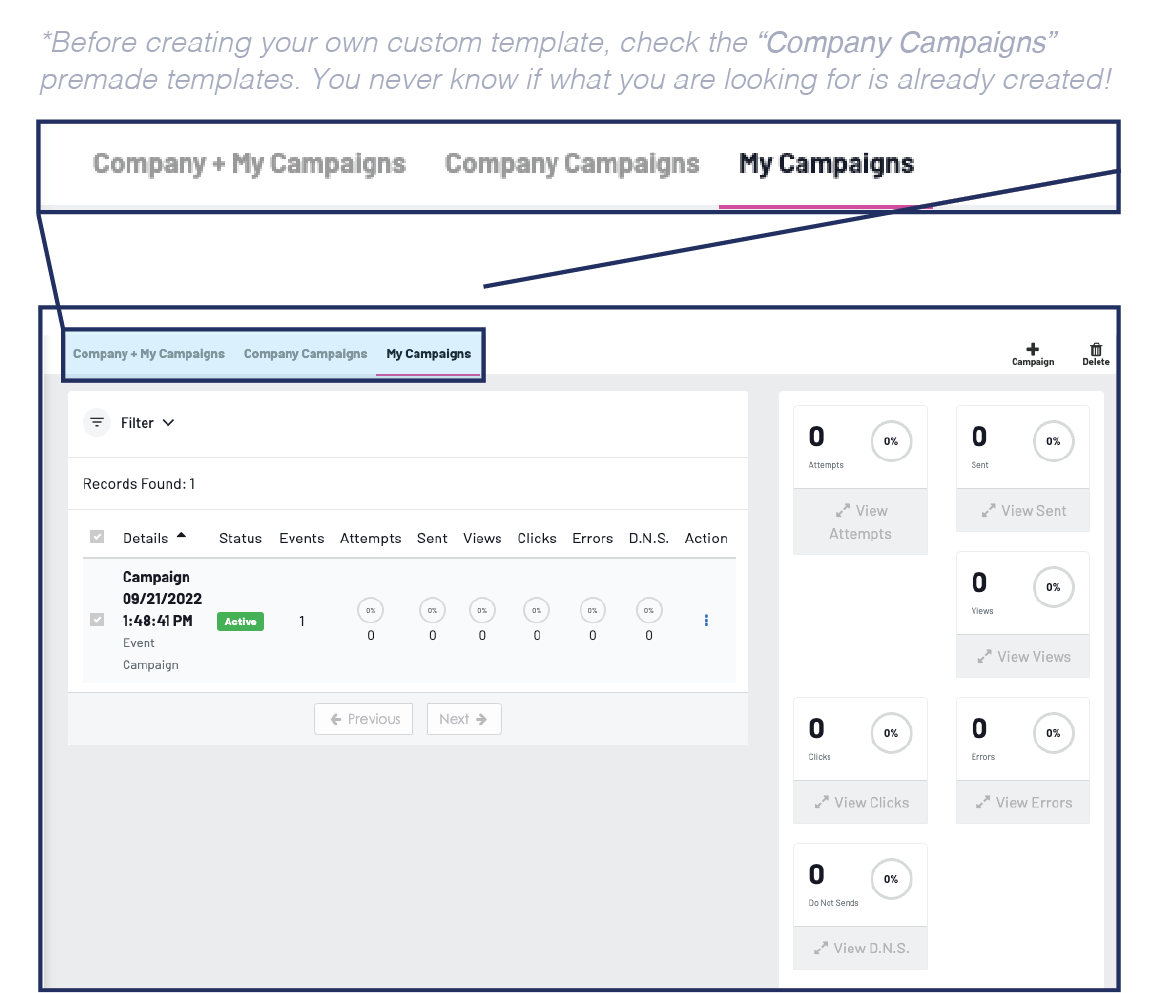
Create a Custom Email Template
Open up www.mycbhome.com and login
On the left side panel, click the Marketing tab
From Marketing, click on the eMarketing tab
From eMarketing, click on the My Saved Content
5. Click on the Campaign button in the top right
6. Pick a template that you would like to use
7. Fill out the info at the top of the campaign template
8. If necessary, insert a photo by clicking on the photo icon and crop to size
9. Add your text to the template
10. Hit Next at the bottom of the page
11. Add the list of recipients for this custom email
12. Click Finish and you are all done!