Capitalizing on Close
Update Contact as Closed Client
Add Clients to Post Closing Action Plan
Add Clients to Campaigns: Market Newsletter, Holiday Ecards, Anniversary, Birthday
Add Close Date to BAY Calendar (Reminder to Follow-up / Send Greeting Card)
Share Just Sold to Social Media
Update Contact as Closed Client
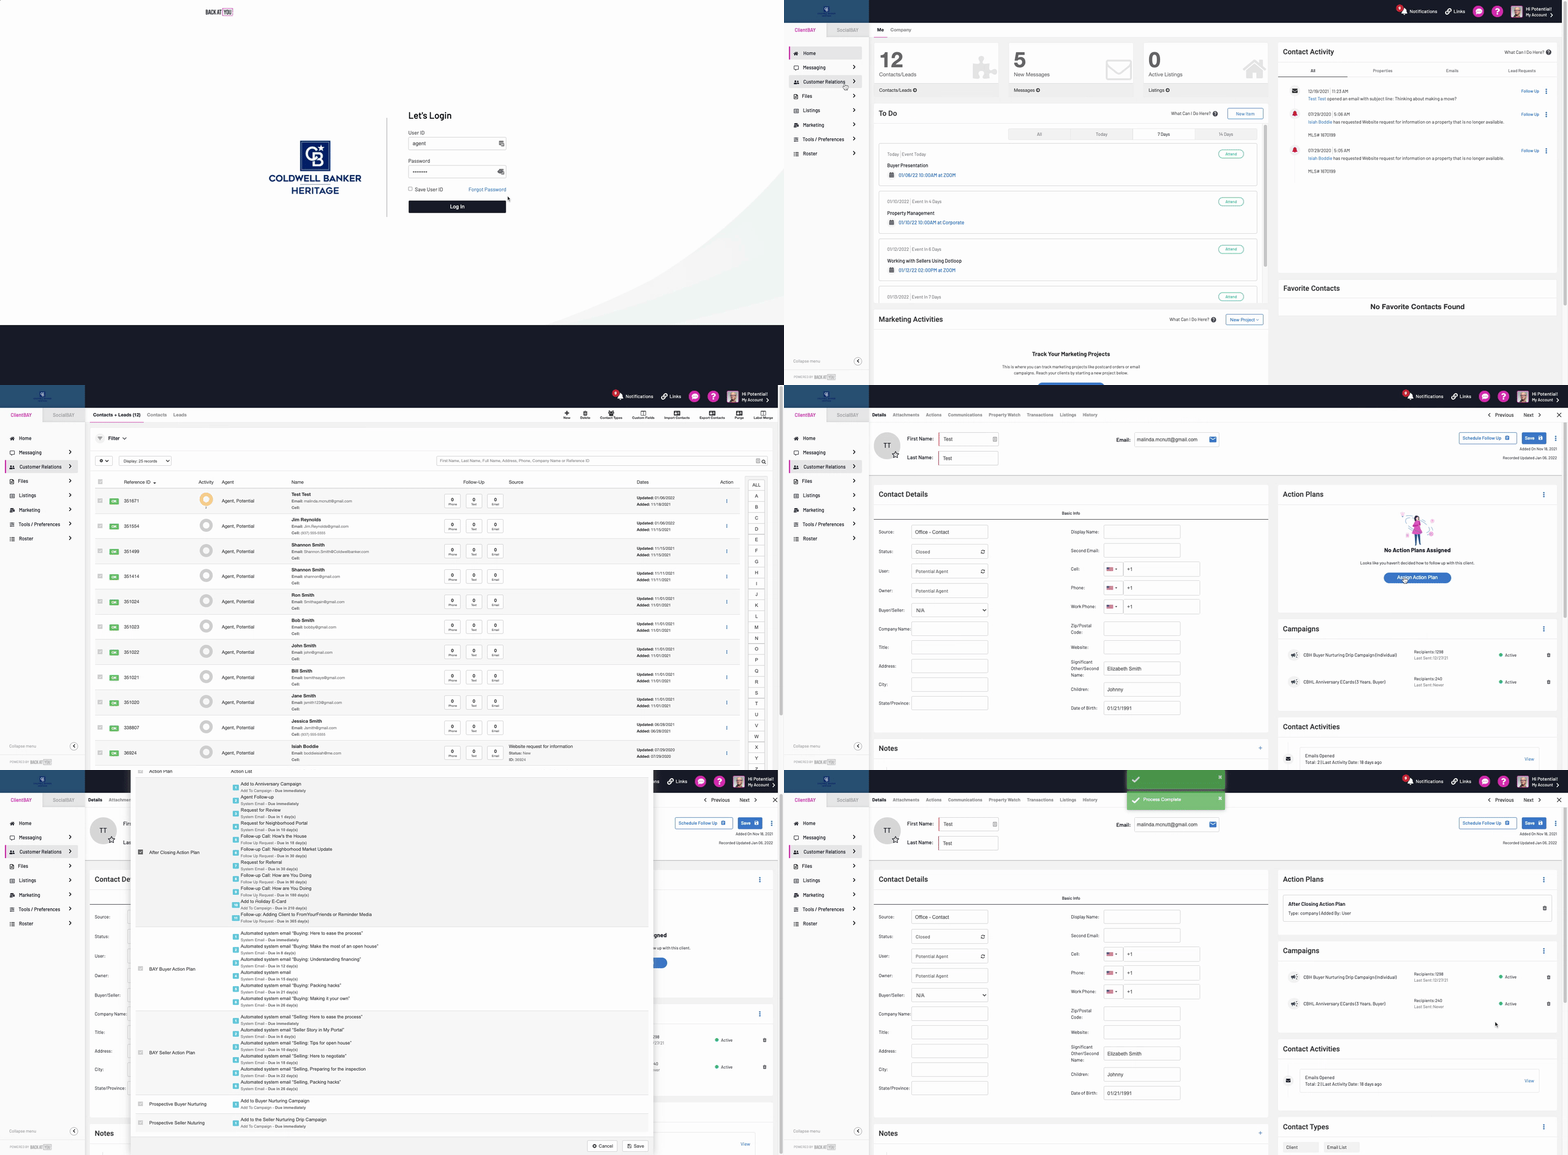
After logging into Back at You, from left-hand menu navigation, select Customer Relations then select My Contacts / Leads
Search for desired contact using search box and select contact
In the contact record, in the Contact Details section update the following contact fields:
Status - Update to Closed
Scroll to the bottom and add the most recent transaction date
Complete additional detail fields - Status, Address, Display Name (salutation), Second Email, Significant Other, Children - the click Save (top-right hand corner)
Scroll below additional details to add notes section, click Add a Note
Add Clients to Post Closing Action Plan
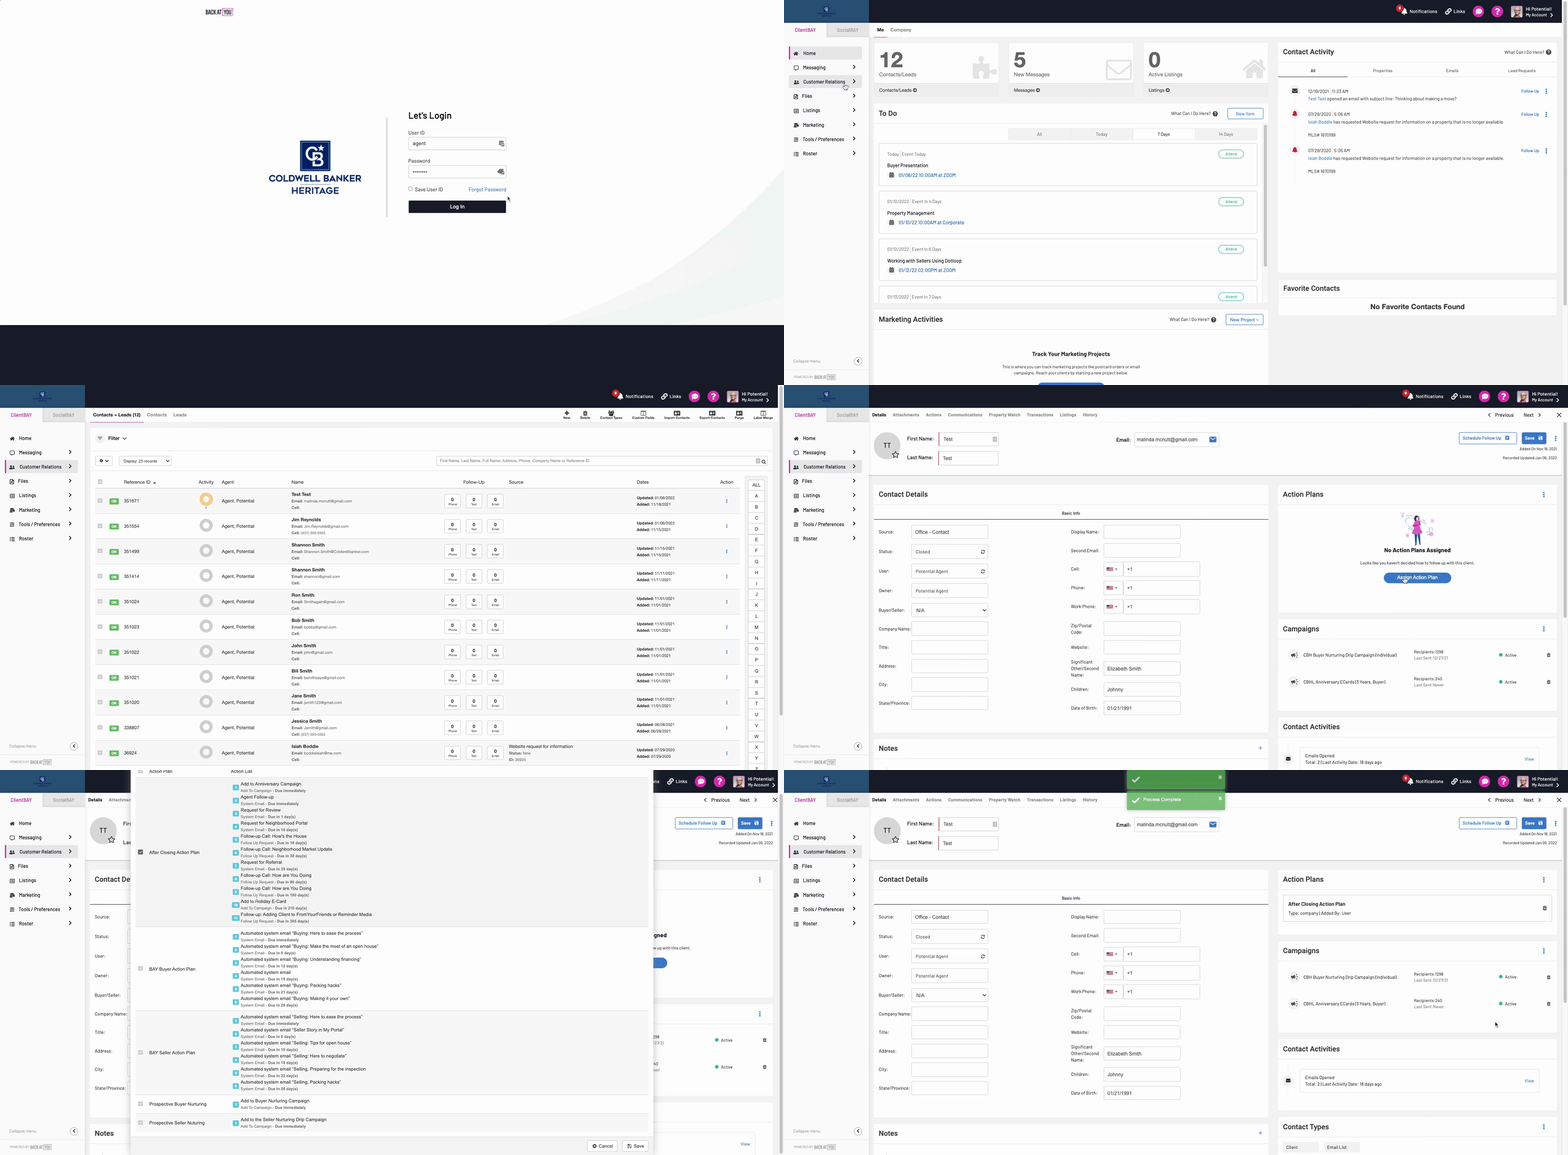
After logging into Back at You, from left-hand menu navigation, select Customer Relations then select My Contacts / Leads
Search for desired contact using search box and select contact
In the contact record, on the right hand side under the Save option, you will see a section called Action Plans. From this section, select Assign Action Plan.
Now you will see a list of available action plans, click the checkbox on the left side of the After Closing Action Plan.
Scroll to the very bottom of all action plan options, and you will see an option to Save.
You should now see the After Closing Action Plan in the contact’s Action Plan section with a trashcan icon next to it. To remove contacts from an action plan, simply click the trash icon to remove.
Add Clients to Campaigns: Market Newsletter, Holiday Ecards, Anniversary, Birthday
To add a single contacts to a campaign:
After logging into Back at You, from left-hand menu navigation, select Customer Relations then select My Contacts / Leads
Search for desired contact using search box and select contact
In the contact record, on the right hand side under the Action Plan section, you will see a section called Campaigns. From this section, select Add to Campaign.
Now you will see a list of available campaigns, click the checkbox on the left side of your desired campaigns.
You can select multiple campaigns for each contact, however please keep consider the frequency of subscription and timing. We recommend adding to campaigns before or after your transaction and removing them from campaigns while you’re in a transaction. This will help to ensure that they are attentive to your emails regarding the transaction.
Newsletters are sent monthly in the last week of the month, and shows stats for prior month and year over year. Keep in mind that newsletter campaigns are labeled by region.
Heritage Holiday ecards are sent roughly every other month.
Birthday cards & anniversary card campaigns rely on adding the transaction date/birthdate to the contacts profile. Therefore they will not send if these are not completed.
Scroll to the very bottom of all action plan options, and you will see an option to Save.
You should now see the chosen campaigns in the contact’s Campaign section with a trashcan icon next to it. To remove a contact from a campaign, simply click the trash icon next to the campaign to remove.
To add a multiple contacts to a campaign:
After logging into Back at You, from left-hand menu navigation, select Customer Relations then select My Contacts / Leads
Either filter by contact type (filter option is above the first contact record) or display multiple records.
From the filtered list of contacts, either select the checkbox above all contacts to select the entire filtered list or select multiple contacts individually by choosing the checkbox next to their name.
Scroll to the very bottom, and you will see an option to + To Campaign. It will prompt you to enter emails if they are missing.
Next you should see a list of available campaigns, click the checkbox on the left side of your desired campaigns.
You can select multiple campaigns for each contact, however please keep consider the frequency of subscription and timing. We recommend adding to campaigns before or after your transaction and removing them from campaigns while you’re in a transaction. This will help to ensure that they are attentive to your emails regarding the transaction.
Newsletters are sent monthly in the last week of the month, and shows stats for prior month and year over year. Keep in mind that newsletter campaigns are labeled by region.
Heritage Holiday ecards are sent roughly every other month.
Birthday cards & anniversary card campaigns rely on adding the transaction date/birthdate to the contacts profile. Therefore they will not send if these are not completed.
Scroll to the very bottom of all campaign options, and you will see an option to Save. Once you’ve saved, all selected contacts will be added to campaign.
Add Close Date to BAY Calendar (Reminder to Follow-up / Send Greeting Card)
Would you like a helpful reminder to send your clients an anniversary card or gift? Use your ClientBay calendar to set-up reminders that can be sent via email or text!
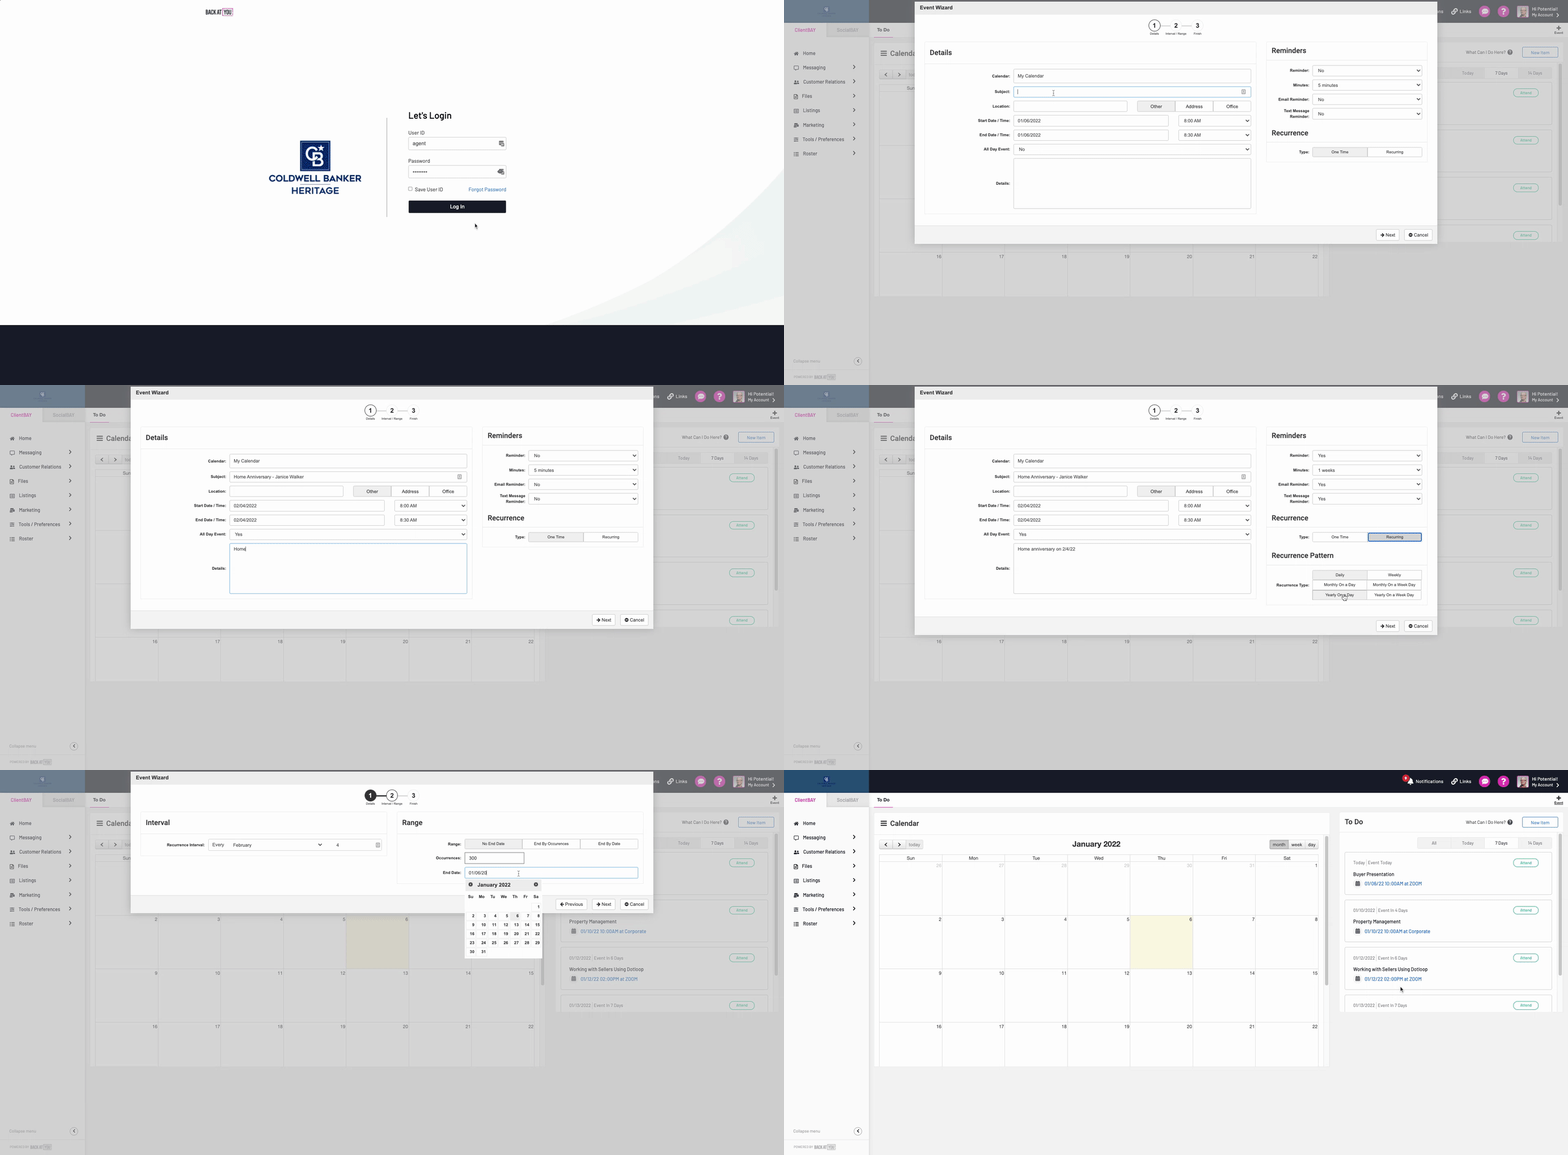
After logging into Back at You, from left-hand menu navigation, select Tools and Preferences then select To Do / Calendar
In the top right hand corner, select +Event
Select My Calendar and complete the event fields. Below are our recommendations for field completion.
Subject: Home Anniversary - Your Client’s Name
Start Date/End Date: Date of clients anniversary this year or next (depending on if it’s passed or not)
All day event: Yes
Details: Client anniversary date (for easy reference), other helpful notes to self
Reminder: Yes
Minutes: How far in advance you want to be notified/reminded about this event (keep in mind timeframe for mailing if you plan to send something via mail)
Email Reminder/Text Reminder: We recommend at minimum setting up a email reminder.
Type: Reoccurring
Reoccurrence Type: Yearly on a day
Reoccurrence Interval: Every X on X date (transaction date)
Range: No end date
Occurrences: 300
End Date: Remove date
Click Next, and should see a summary of your responses. Now click, Finish. Double-check event to make sure it has been added.
Share Just Sold to Social Media
Log into Back At You. On the left-hand menu, select SocialBAY. If you have not connected your social media to your account, you will be prompted to do so before you can continue.
From the Social Media Center, go to the left-hand menu navigation and select Listings.
Locate the listing you would like to promote as Just Sold and click Schedule a Listing Post.
Go to where you see Listing Status, click in the field to the right, and select Sold.
You can also make changes to other sections of the post if you would like:
If you need to edit the bedroom or bathroom count, go to where you see Details, click in the text boxes to the right, and type the correct number in for each.
If you would like to change the Caption, Title, or Description, click in each text box and replace it with new verbiage. To add an emoji to the post, click on the smiley face to the right of each text box and select the emoji you would like to use.
If you would like to change the listing photo, you can either select a different image from the listing by clicking on the arrows above the current image, or you can click Upload Images to upload a new photo.
When done editing, click Continue.
If you would like to run an ad to advertise your sale, select “Yes,” click Continue, and follow the prompts. If not, select “Don’t advertise” and click Continue.
Now you can schedule your Just Sold post for social media. To change the date for posting, click the date field and select the new day you would like to post on. To change the time for posting, click the time field and select the new time you would like it to be posted at.
Below the date and time options, select the desired social media channel(s) you would like to post to.
Click Let’s Schedule at the bottom.
Share Testimonial to Social Media
Copy testimonial from Zillow, Realtor.com or other source for testimonial
Log into Back at You, from left-hand menu navigation, select Marketing under Emarketing select My Saved Content
In top-right hand corner, select Add Content
Select from the contact type dropdown - Company Template
Then use search bar to narrow further by searching “Testimonial”, once found click Select next to the appropriate template (Social_testimonial_template_heritage)
Click on the testimonial text box and delete existing text and right-click and click paste and then click OK
Next update the reviewer with the name or something descriptive but generic - “Sold Single Family Home in Kettering” and then click OK
Once you’ve completed your edits, in top-right hand corner, click Save & Share
Another menu will appear, under the Share With section select the desired social media channel
Add Testimonial to Website
Please note Zillow reviews will automatically be displayed into your website, so you do not need to add testimonials if they are already on Zillow. However, you can use this to add testimonials from other sources such as Facebook, Google, Realtor.com, Homesnap, etc.
Copy testimonial from Realtor.com, Facebook, Google or other source for testimonial
Log into Back at You, from left-hand menu navigation, select Marketing under the Misc section select Testimonials
In top-left hand corner, select Add Content
Select from the contact type dropdown - Company Template
Above the testimonials in the right-hand corner, select New.
Complete fields and hit save.
Your testimonial will now appear in your about me section on the Coldwell Banker Heritage website and on your Back at You agent website along with your Zillow reviews.
Schedule Follow-up in Back at You
Within the contact record, click “Schedule Follow Up.”
Enter all of the information you need for the follow-up, including the name/date/description. Click “Schedule” and the follow-up action will automatically add to your to-do list on your main Home Dashboard when it is within 7-14 days to be completed.
In the top right-hand corner click “Save.”


